Sewing Technique
Master Fabric Cutting Like a Professional: Complete Guide to Rotary Cutters & Mats
15 July 2026 · 10 min read · By ONSA
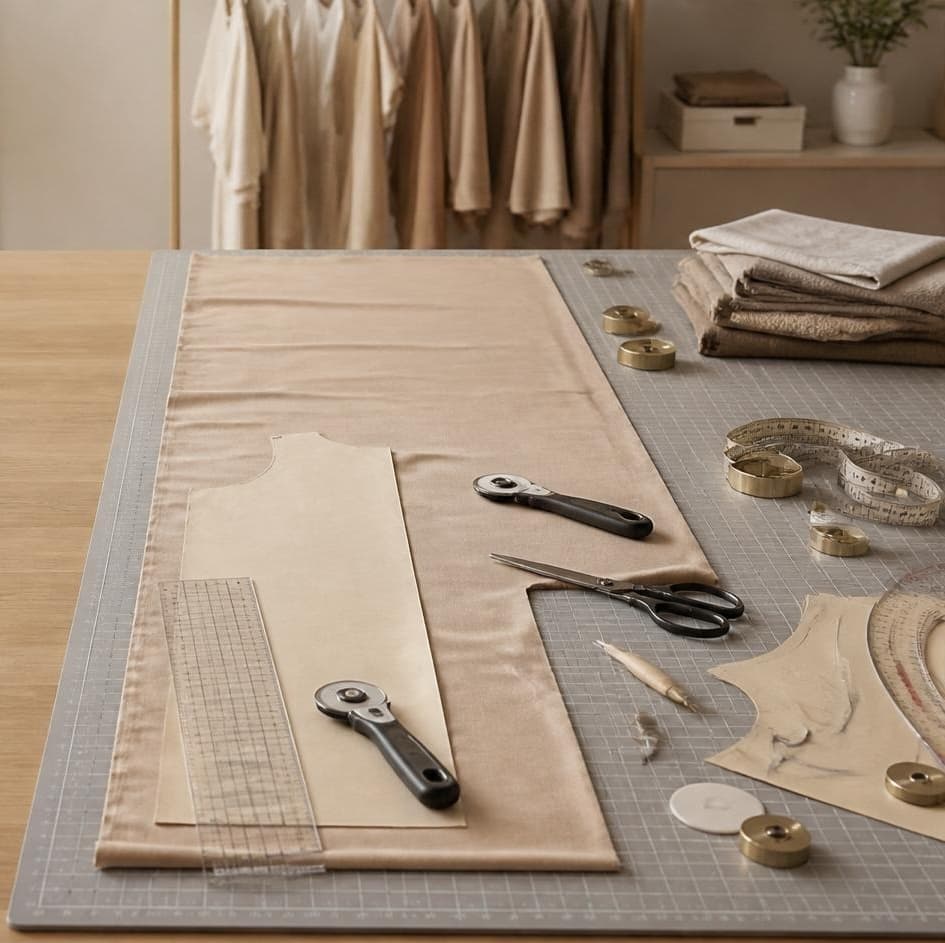
Once you've prepared an excellent pattern, the next crucial step is cutting the fabric correctly. One wrong cut means disaster for the whole garment.
Most tailors in India still use only scissors. But professional sewists know that a rotary cutter and self-healing mat let you cut not just faster, but more accurately too. In this post, you'll learn how to take your fabric cutting to a professional level.
Scissors vs Rotary Cutter: What's the Difference?
Many beginners think it's just a question of speed. But in reality, a rotary cutter and scissors are completely different tools, and each has its own use.
✂️ Advantages of Scissors:
- • Perfect for cutting curved edges (necklines, armholes)
- • Great for detail work (pockets, appliqués)
- • Can handle thick fabrics
🔄 Advantages of the Rotary Cutter:
- • Cuts straight edges perfectly
- • Cuts multiple layers at once (up to 3-4 layers)
- • 3x faster than scissors
- • Much less hand fatigue
- • Lines stay perfectly straight
In professional sewing, you use both. A rotary cutter for straight pattern pieces (kameez body, kurti panels) and scissors for detailed work (neck shapes, sleeve curves). This combination is the fastest and most accurate.
The Complete Fabric Cutting Toolkit
1. Rotary Cutter — Your Most Important Tool
What it is: A handle with a circular blade that cuts fabric as it rolls.
Size selection: 45mm (perfect for beginners, cuts everything) and 60mm (for larger pieces, less hand effort needed). 28mm is too small and usually isn't necessary.
Safety rules you should follow:
- • Always cut away from your body — never toward yourself
- • Keep your hand on the ruler, not on the fabric
- • Always keep the blade sharp — a dull blade needs more pressure and can slip
- • Guide the cutter with one hand and the ruler with the other
- • Never take the rotary cutter off the mat
2. Self-Healing Cutting Mat — The Heart of Your Workstation
What it is: A special mat that absorbs the rotary cutter's blade and self-heals (meaning the cut lines close up automatically).
Size recommendation: A3 (36 x 24 inches) is enough to start with. A2 (24 x 18) if you have less space. A1 (48 x 36) if you work at production level.
Mat care tips:
- • Always store it flat, never rolled
- • Don't always cut in the same spot — rotate the mat
- • Wipe with a dry cloth occasionally
- • A mat loses its effectiveness after 1-2 years of heavy use, so replace it then
- • Don't buy cheap mats — good mats save money long-term
3. Ruler — Accuracy of the Line
Why a transparent ruler matters: If you use an opaque ruler, you won't be able to see exactly where you're cutting.
Ideal measuring ruler: 18-24 inches long, transparent, with grid lines, non-slip backing. Keep a ruler dedicated to fabric cutting (separate from the one for pattern measuring).
Complete Fabric Cutting Workflow
Step 1: Fabric Preparation (This Matters Most)
This is where most beginners make mistakes. Straightening the fabric is essential, or the patterns won't cut correctly.
Proper fabric preparation:
- • Wash it: If it's cotton, give it a light wash (fabric can shrink)
- • Dry it: It needs to be completely dry, or it'll damage the mat
- • Iron it: Iron out all wrinkles. Wrinkled fabric can cause a +/- 1/4 inch cutting error
- • Lay it out: Lay it perfectly flat on the mat. No folds or puckering
Step 2: Align Your Fabric
Use the mat's grid lines. The fabric's edge should be perfectly aligned with the mat's edge. If the fabric is even slightly tilted, entire pieces will come out wrong.
Step 3: Ruler Placement and Cutting
Technique:
- 1. Place the ruler exactly on your cutting line
- 2. Firmly press the ruler's edge with one hand (otherwise it will slip)
- 3. Roll the rotary cutter against the ruler — smooth, consistent pressure
- 4. Cut in one motion, not repeatedly — repeated cutting frays the fabric
The most common mistake: Not pressing the ruler down properly. Result: slightly tilted cuts that make the garment uneven.
Step 4: Cutting Multiple Layers
The rotary cutter's biggest advantage is being able to cut 3-4 layers at once. But it needs to be done carefully.
Best practice: Layer the same type of fabric together (not a thin layer under a thick one, since blade pressure will be uneven). Don't go beyond 4 layers — blade accuracy suffers.
Skill Levels: Basic to Professional
Level 1: Basic Cutting Skills
What you can do: Cut curved edges with scissors, cut straight pieces with scissors.
Tools: Good quality scissors, ruler, fabric pencil
Level 2: Intermediate — Rotary Cutter Introduction
What you can do: Quickly cut straight edges with a rotary cutter, cut multiple pieces at once.
Tools: Rotary cutter (45mm), cutting mat (A3), ruler, scissors (for curves)
Level 3: Professional — Speed and Accuracy
What you can do: Complete production workflow, multiple pieces with production-level accuracy, efficiently cutting complex shapes too.
Tools: Multiple rotary cutters (45mm + 60mm), premium mat, measuring rulers, pattern weights, specialty tools
Common Cutting Mistakes and Solutions
❌ Mistake 1: Unequal Cut Pieces
Cause: The ruler isn't properly aligned, or the cutter is being used at an angle.
Solution: Always use the mat's grid lines as a reference. Align the ruler perfectly with the edge.
❌ Mistake 2: Frayed Edges
Cause: A dull blade or multiple passes.
Solution: Always keep the blade sharp. Cut in one motion, not repeatedly.
❌ Mistake 3: Damaged Mat
Cause: Using the rotary cutter directly on the table (without a mat).
Solution: ALWAYS use a mat. It doesn't just protect you, it protects the mat too.
❌ Mistake 4: Inaccurate Seam Allowances
Cause: Not offsetting the ruler from the pattern line.
Solution: Clearly mark where the pattern line is and where the seam allowance is. Place the ruler on the seam allowance line, not the pattern line.
FAQ: About Fabric Cutting
Q: Can I use a cutting mat on cardboard or plastic?
No! Keep a self-healing mat only on wood or a self-healing surface. Cardboard ruins the mat's self-healing property.
Q: How long does a rotary cutter blade last?
3-6 months with heavy use. 1+ year with light use. Change the blade once cutting starts requiring more force.
Q: Can a rotary cutter be used for leather or silk?
Silk — yes, on a cutting mat. Leather — no, it damages the rotary cutter. Use scissors for leather.
Cost of a Professional Cutting Setup
Beginner kit (₹3000-5000): Rotary cutter 45mm, A3 mat, ruler, scissors
Intermediate (₹8000-12000): 2 rotary cutters, A2 mat, premium rulers, fabric weights
Professional (₹15000+): Multiple cutters, A1 mat, rotary mat for storage, specialty rulers, pattern weights
This investment is worth it. It breaks even after just 2-3 garments, because the time and accuracy you save recover the cost of the cutting setup.
Want to Master Professional Cutting Techniques?
In ONSA's courses, you'll learn complete fabric preparation and cutting workflow.
ONSA — Online Sewing Academy has taught 3000+ students a complete sewing workflow. Every student is achieving production-level accuracy and speed.